A video export, design package, photo archive, or database backup can outgrow an email attachment before the work is even finished. The reliable response is not a chain of numbered messages. Upload the file once, test the recipient path, and use email only to deliver the link and context.
This guide explains how to send large files online without turning a broad delivery task into a provider-specific checklist. It covers method choice, preparation, a practical handoff, and the checks that matter before you send anything important.
Quick answer: upload once and send a tested link
For most large files, use this sequence:
- Confirm the final file, recipient, and deadline.
- Package related items in a clearly named folder or ZIP archive.
- Choose cloud storage for ongoing collaboration or a transfer route for a finished handoff.
- Upload over a stable connection and wait for processing to finish.
- Apply only the access the recipient needs.
- Open the link in a signed-out browser and test the real download path.
- Email the tested link with the filename, approximate size, and expected action.
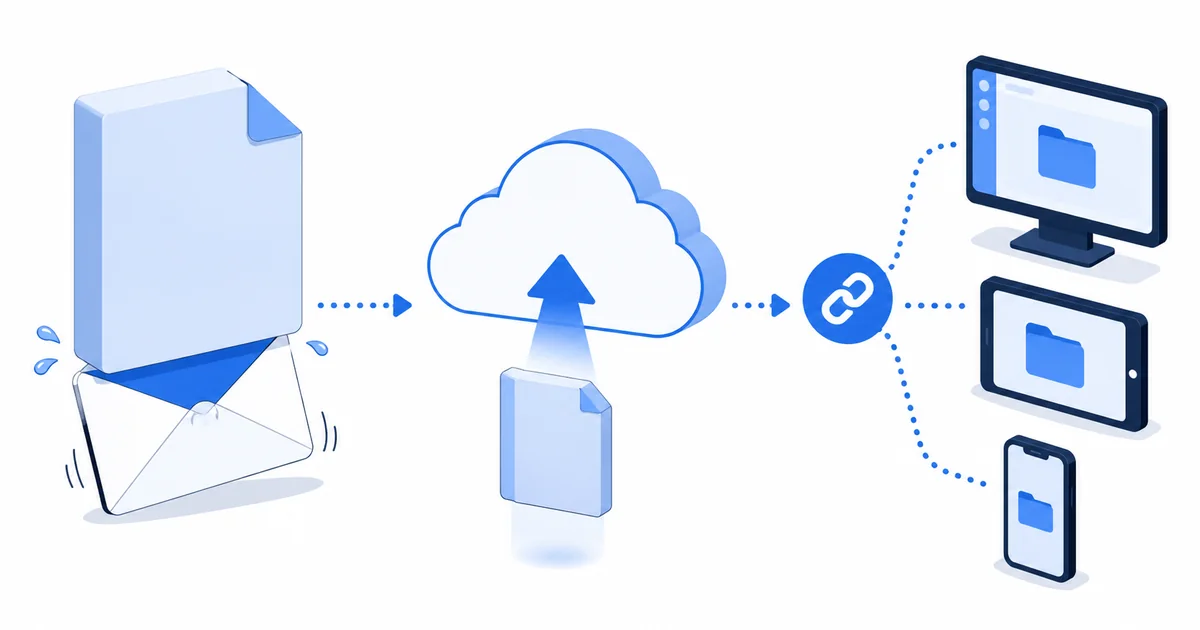
This workflow works because the email stays small while the service handles the large file. It also gives you one delivery route to check instead of several partial attachments.
Why email attachments fail with large files
Email providers enforce attachment limits. Google says personal Gmail accounts have a 25 MB attachment limit and directs users to Google Drive for files over the limit. Google also notes that Workspace administrators set limits for work and school accounts. Microsoft lists a 25 MB file-attachment limit for Outlook.com and points to OneDrive for larger files.
The number shown in your file manager is not the entire message. Email encoding adds overhead, while signatures, inline images, and message text use part of the allowance. The recipient’s server can also reject a message that your provider accepted. That is why an attachment near a published limit may still fail.
Some mail products move the payload out of the message for you. Apple says Mail Drop supports attachments up to 5 GB. That is a provider-specific option, not a universal email standard. Check its current limits and recipient experience before depending on it.
The useful distinction is simple: email is the notification channel; storage or transfer is the delivery channel. Once large files move through a link, the sender can focus on upload completion, recipient access, and the correct version.
Choose the right delivery method
Use cloud storage for a working file
Cloud storage suits large files that will stay active after the first download. It is a sensible choice when several people need one current copy, when a recipient will comment or edit, or when the owner expects to replace a draft. The trade-off is that permissions and versions need deliberate management.
Keep this decision separate from the mechanics of a one-time transfer. The comparison between cloud storage and file-transfer services explains the two models in more depth. For this guide, the deciding question is whether the recipient needs continuing access or only a finished deliverable.
Use a transfer route for a finished delivery
A transfer route fits large files such as a final video, print package, archive, or other deliverable that the recipient should download rather than edit in place. Before uploading large files, check the provider’s current account requirements, per-file boundary, retention behavior, and recipient steps. Do not infer privacy or access controls from a long URL.
Use provider-integrated sharing for convenience
When large files are sent from an existing mail workflow, Drive, OneDrive, and Mail Drop can reduce switching between services. Convenience does not replace a recipient test. Confirm whether the link asks for sign-in, whether the right account has access, and whether the recipient can perform the required action.
Use physical media when the network is the bottleneck
For very large files on a slow upstream connection, a physical drive may finish sooner than an internet transfer. That creates a different handoff problem: the device can be delayed, damaged, or lost. Use an appropriate protected workflow for sensitive material, document who receives the drive, and retain the source copy.
Prepare large files before uploading
Preparing large files carefully saves more time than choosing a clever transfer tool. Remove abandoned drafts, cache files, unrelated exports, and hidden credentials. Give the final folder and file names enough context to make sense on the recipient’s device. Avoid names such as final-final-2.zip that leave the recipient guessing.
ZIP packaging is useful when large files arrive as a set. It preserves the folder structure and turns many upload selections into one. It may shrink documents and uncompressed data, but JPEG, MP4, and other compressed formats often become only slightly smaller. Use ZIP for organization first, not as a promise of dramatic size reduction.
Record the byte size of the finished package before upload. If transfer time matters, use the File Transfer Time Calculator with your measured upstream speed. The focused 10 GB upload-time guide explains the estimate, while Mbps versus MB/s covers the units. Those pages own the arithmetic; this page owns the overall delivery decision.
Keep the source file until the recipient confirms the handoff. A share link is a delivery route, not proof that your only copy is safely backed up.
Send large files online in seven steps
1. Confirm the expected deliverable
Ask which format and version the recipient needs. For a video, that might be a review proxy or final master. For a design job, it could be flattened output rather than every working file. Sending less can reduce transfer time without reducing usefulness.
2. Measure the finished package
Check the final byte size after packaging, not the size of an earlier export. Confirm there is enough room in the sending account and on the recipient’s device. Keep storage allowance, per-file limits, and attachment limits separate; they are not interchangeable.
3. Choose the route before the long upload
Review the current official documentation for the service you plan to use. Check the exact account tier and recipient path rather than relying on an old screenshot or remembered limit. If the package does not fit, choose another route before waiting through a failed upload.
4. Upload over a stable connection
Use a stable network, connect power, and prevent the computer from sleeping. Avoid starting a critical upload just before leaving a network. If the upload is unexpectedly slow, use the separate upload-speed troubleshooting guide to isolate Wi-Fi, upstream bandwidth, browser, or service factors instead of repeatedly restarting at random.
5. Apply the narrowest practical access
Use recipient-specific access when the service supports it and the material warrants it. Choose download or view access for a finished handoff; choose edit access only when collaboration requires changes to the shared original. Provider controls differ, so the button label alone is not evidence of the signed-out result.
6. Wait for processing and test
Large files may need server-side processing after the upload indicator reaches 100 percent. Wait until the item is available, then copy the final share link and run the recipient test below. Do not loosen access merely because your first signed-out test fails.
7. Send context, then retain a delivery record
Send the link with the expected filename, approximate size, format, and deadline. Keep a minimal delivery note containing the project, date, recipient, and route used. Do not put passwords, private links, or confidential filenames in a broad team log.
Test the recipient path
A link that works in the sender’s browser may depend on the sender’s session. Open a private browser window with no sender account signed in. Paste the exact link from the handoff message, not a dashboard URL. Check what the recipient sees before clicking anything.
- Confirm the page identifies the expected file without exposing unrelated items.
- Check whether sign-in is required and whether that matches the intended recipient.
- Download a harmless representative package when practical.
- Compare the downloaded filename and byte count with the prepared source.
- Repeat on a phone if mobile delivery matters.
For video-specific proxy and master decisions, use the narrower guide to sharing large video files with clients. This article stays at the generic large-file level and does not repeat that production workflow.
If the transfer needs stronger integrity evidence, a separately communicated expected SHA-256 value can help the recipient detect whether the bytes differ. A checksum does not prove authorship, trust, or malware safety. The SHA-256 verification guide owns that procedure.
Write a useful handoff message
A good message gives large files enough context for the recipient to judge what arrived and what to do next. Include:
- the project or deliverable name;
- the expected filename and approximate size;
- whether it is a draft, proxy, or final version;
- the required action, such as download or review;
- the response deadline;
- a separate trusted contact route if the link looks unexpected.
Avoid vague messages such as “files here.” They resemble phishing lures and make version mistakes harder to spot. Do not place a link password beside the link in the same message. More importantly, do not claim that a password, expiration date, or revocation control exists unless you verified that exact provider flow.
Avoid common large-file mistakes
Splitting one delivery across many emails. Parts are easy to miss and hard to reassemble. Package related items once and send one tested route.
Starting with the biggest possible package. Remove material the recipient did not request. Smaller large files finish sooner and create fewer version choices.
Confusing download speed with upload speed. The sender’s upstream rate usually governs the initial transfer. Use a measured upstream figure for planning.
Making a link public to fix access. Check the intended account and sharing configuration first. Public access should be a deliberate decision, not a troubleshooting shortcut.
Assuming upload completion means recipient readiness. Processing, permissions, or sign-in can still block the handoff. Test the final link outside the sender session.
Claiming controls from memory. Password, expiration, revocation, scanning, and capacity vary by provider, plan, account, and date. Confirm current official documentation and the actual recipient flow.
Deleting the source too soon. Wait for recipient confirmation and follow the relevant retention or backup policy. Delivery is not the same as backup.
Where Filekub can fit
If you want to evaluate Filekub as a route for large files, start with a non-sensitive sample at Filekub. Upload the sample, create the intended recipient path, and test it from a signed-out browser before using the same pattern for real work.
This is an invitation to verify the current workflow, not a claim about a fixed file limit, password protection, expiration, revocation, end-to-end encryption, scanning, unlimited capacity, or another control that was not tested for this refresh. Choose a provider only after its present behavior fits the file, recipient, and risk.